Install the App
-
Install the App
You can install it manually, by downloading the
Copilot for Xcode.appfrom the latest release.Or, you can install it via Homebrew:
Terminal window brew install --cask copilot-for-xcodeOptionally, move the app to the
/Applicationsfolder.Open the app, the app will create a launch agent to setup a background running Service that does the real job.
-
Enable the Extension
Enable the extension in
System Settings.app.-
macOS 15
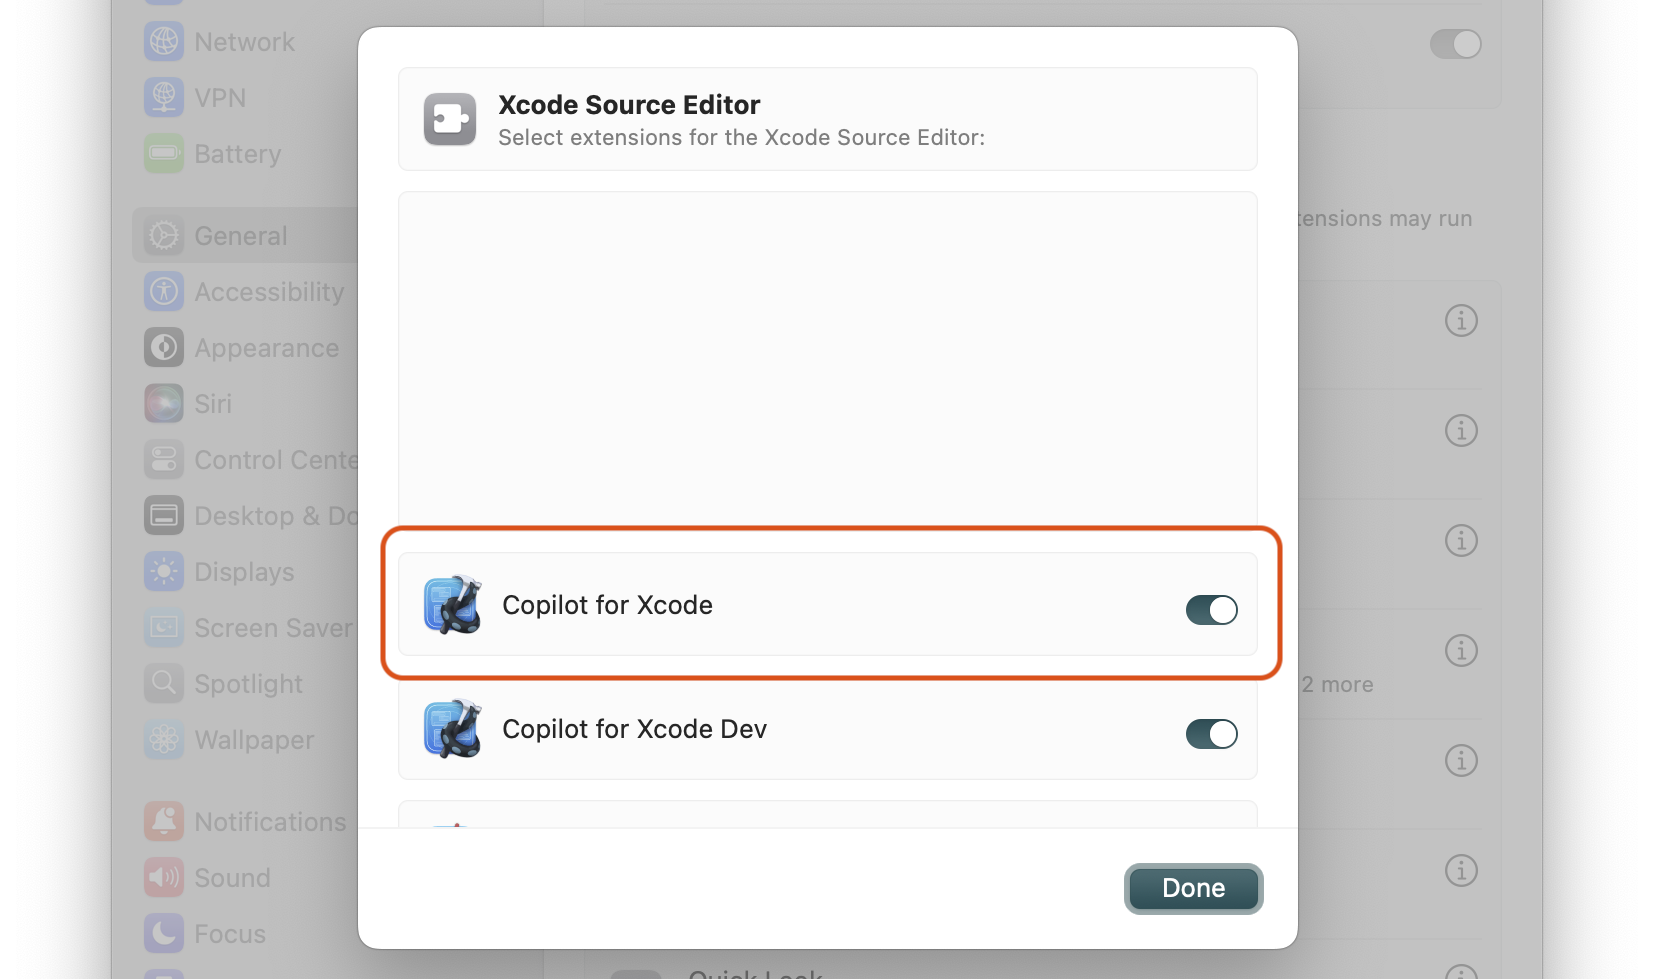
From the Apple menu located in the top-left corner of your screen click
System Settings. Navigate toGeneralthenLogin Items & Extensions. ClickXcode Source Editorand tickCopilot for Xcode.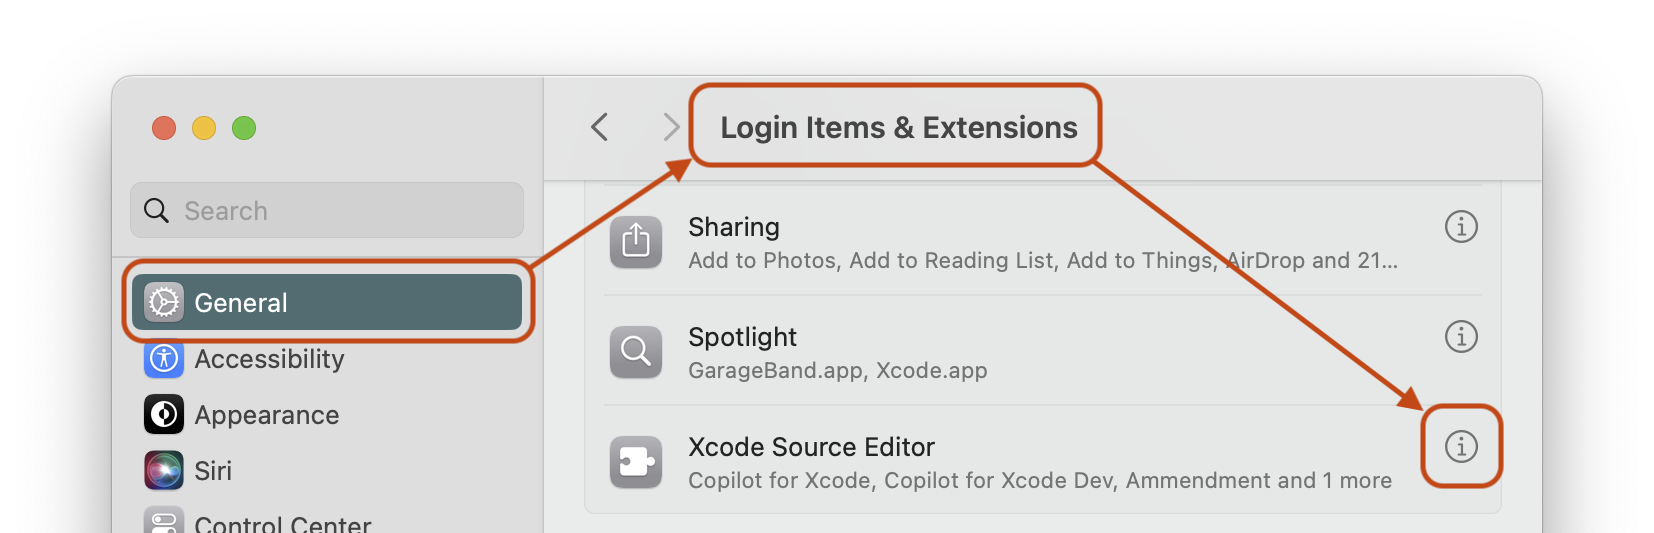
-
macOS 14
From the Apple menu located in the top-left corner of your screen click
System Settings. Navigate toPrivacy & Securitythen toward the bottom clickExtensions. ClickXcode Source Editorand tickCopilot. -
Older Versions
If you are using macOS Monterey, enter the Extensions menu in System Preferences.app with its dedicated icon.
-
-
Granting Permissions to the App
The first time the app is open and command run, the extension will ask for the necessary permissions.
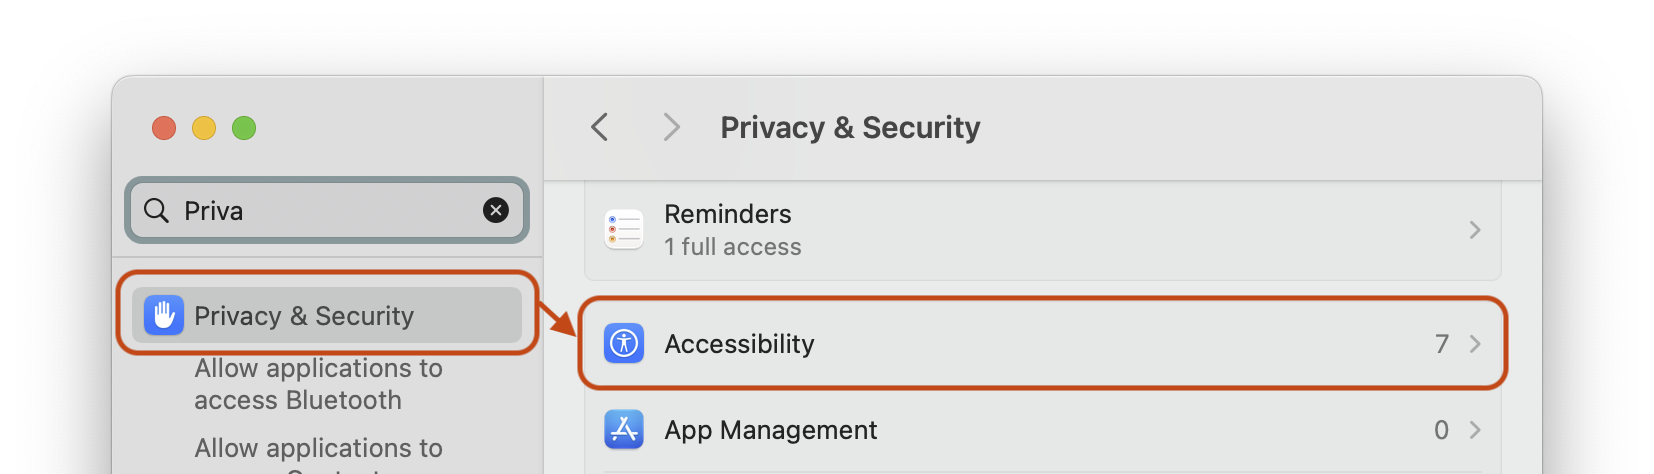
Alternatively, you may manually grant the required permissions by navigating to the
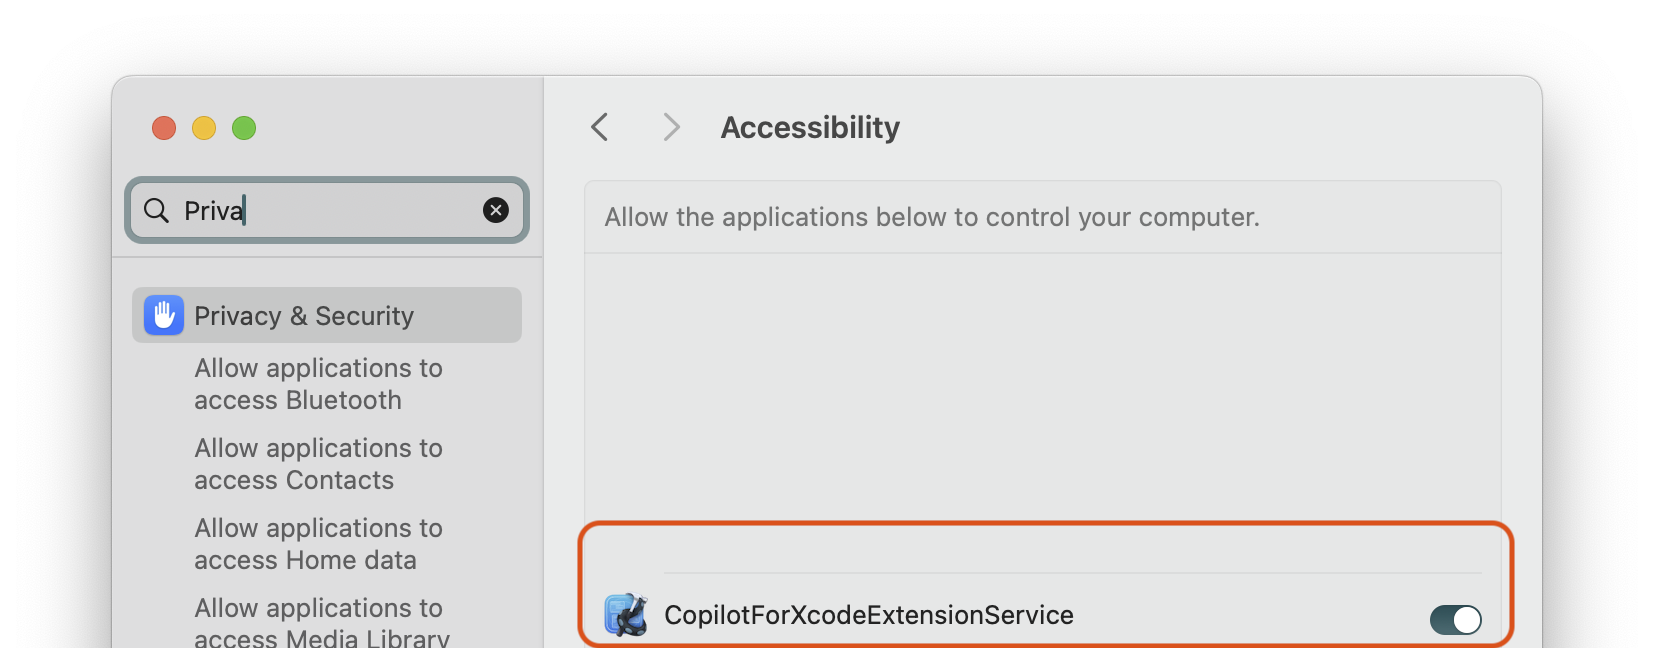
Privacy & Securitytab in theSystem Settings.app.- To grant permissions for the Accessibility API, click
Accessibility, and dragCopilotForXcodeExtensionService.appto the list. You can locate the extension app by clickingReveal Extension App in Finderin the host app.
If you encounter an alert requesting permission that you have previously granted, please remove the permission from the list and add it again to re-grant the necessary permissions.
- To grant permissions for the Accessibility API, click